Introduction
If you’ve ever bitten into a golden, airy pastry whose buttery layers almost melt in your mouth, you’ve experienced the magic of a perfectly made croissant. This article will walk you through a classic French croissant recipe, step by step, teaching you how to make French croissants in your own kitchen — from mixing the dough, lamination, shaping, proofing, to baking.
Whether you’re aiming for an authentic French croissant recipe, a homemade croissant recipe for weekend brunch, or a slightly simpler easy croissant recipe, this guide covers everything so you can achieve flaky, buttery, irresistible results.
While the process takes patience and precision, the reward is an iconic French pastry with delicate layers, rich aroma, and a tender, honeycomb-like crumb inside.
Why Croissants Are Worth the Effort
Croissants are a form of enriched, laminated pastry — dough layered with butter, folded, and rolled repeatedly to create thin alternating sheets. When baked, steam forms between the layers, producing the classic flaky texture and light, airy crumb.
A true French pastry recipe relies on technique and timing. Each fold, rest, and chill period contributes to that signature buttery crispness. Using good-quality butter with a high fat content (at least 82%) and maintaining a cool temperature during the lamination process are key to success.
Ingredients and Equipment
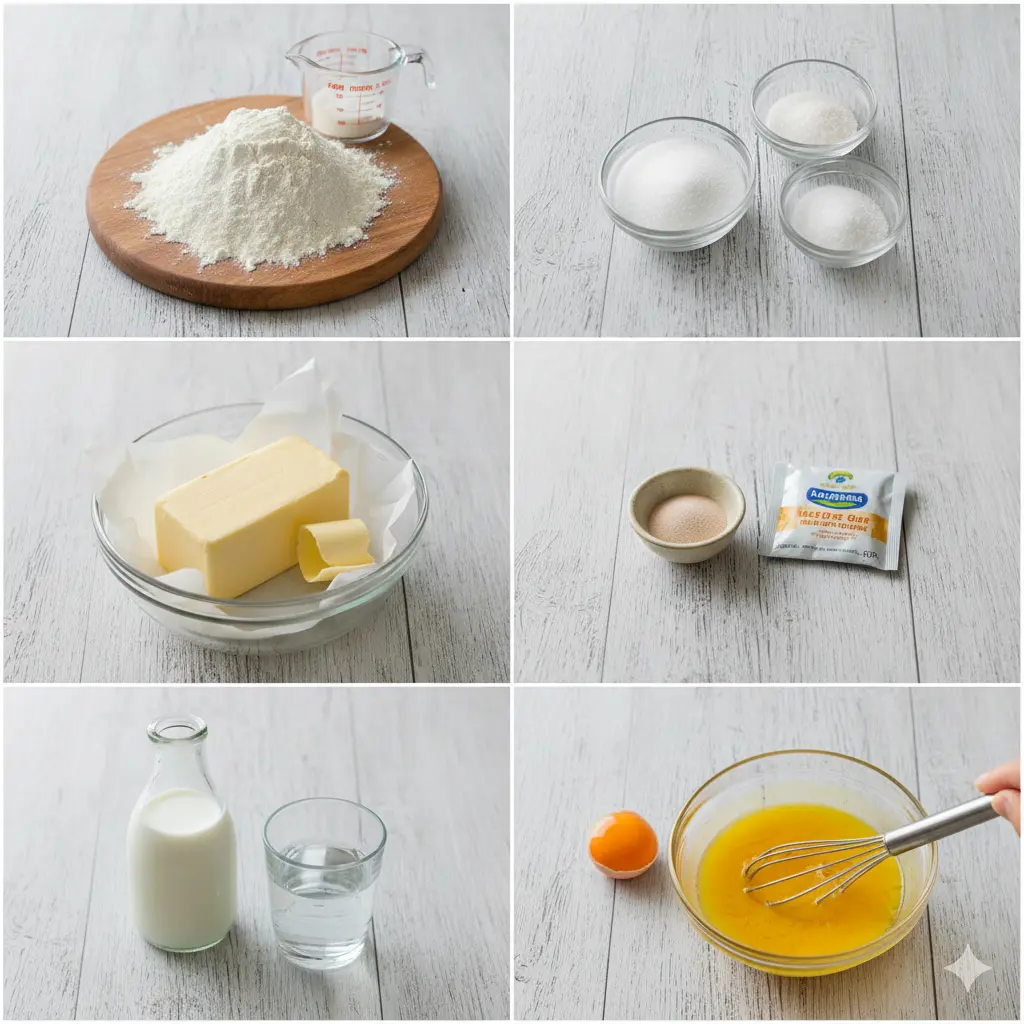
Ingredients
- Bread or all-purpose flour (Type 55 if available)
- Active dry yeast or instant yeast
- Milk (for enriching the dough)
- Water (for hydration)
- Sugar (for flavor and yeast activation)
- Salt (to balance taste)
- Unsalted butter (cold, 82% butterfat or higher)
- Egg wash (1 egg yolk mixed with milk or cream)
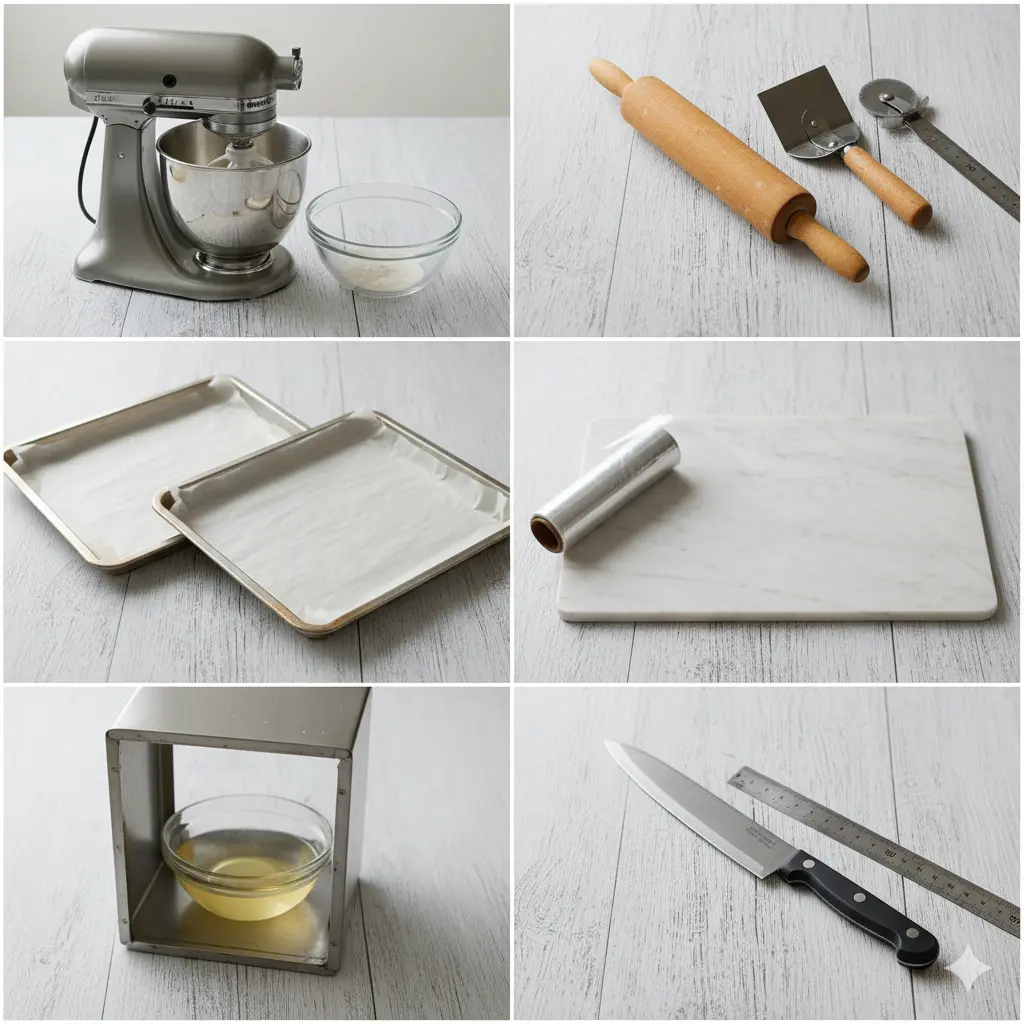
Equipment
- Mixing bowl or stand mixer
- Rolling pin
- Sharp knife or pizza cutter
- Ruler (for precise triangle cutting)
- Parchment-lined baking trays
- Plastic wrap or cling film
- Dough scraper
- Cool surface for rolling (marble preferred)
- Warm, humid space for proofing (around 25°C)
Step-by-Step Process
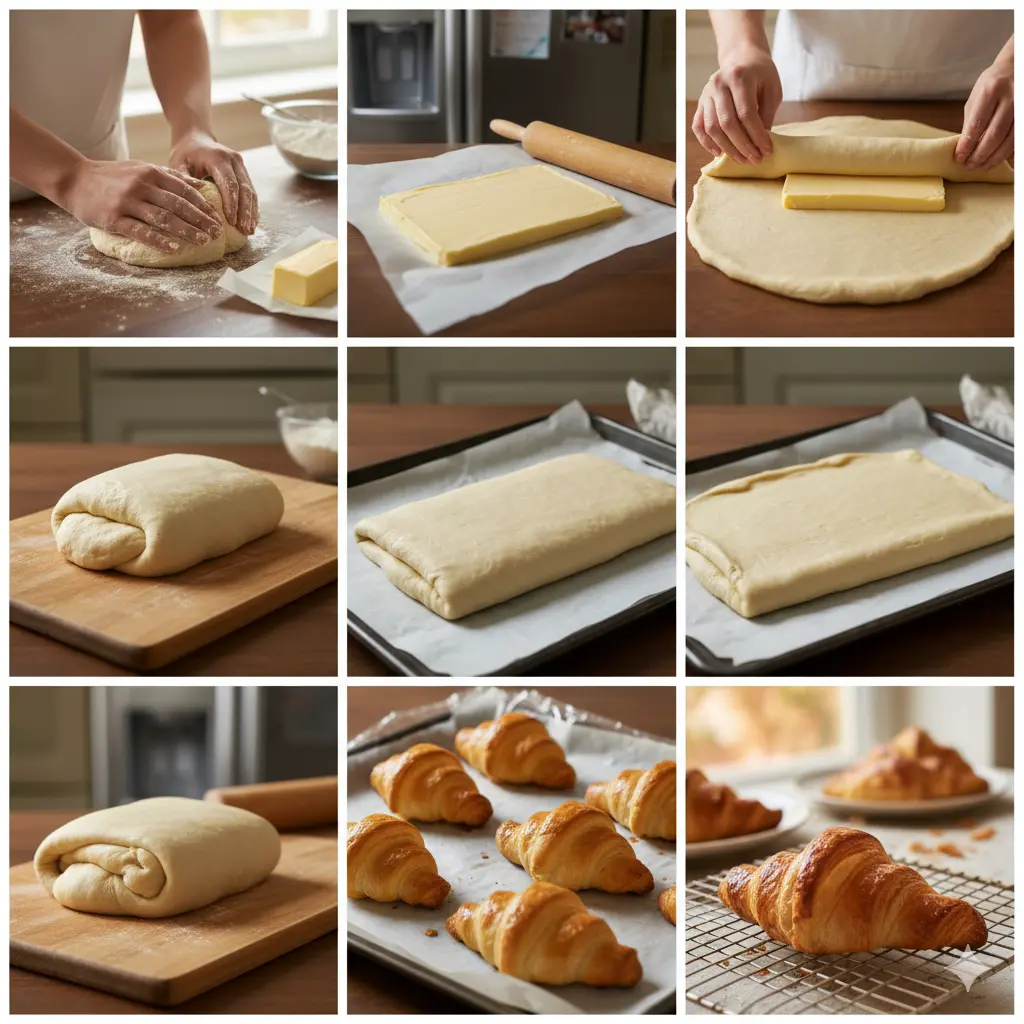
1. Make the Dough (Détrempe)
Mix flour, yeast, sugar, salt, milk, and water until a smooth dough forms. Knead until elastic and slightly tacky. Rest and chill for at least 30 minutes. This chilling step keeps the butter from melting during lamination later.
2. Prepare the Butter Block
Use high-quality cold butter. Shape it into a flat rectangular slab between parchment sheets. Chill until firm but pliable — cold enough to hold its shape, yet soft enough to bend without cracking.
3. Encase the Butter and Perform the First Fold
Roll the dough into a large rectangle. Place the butter block in the center and fold the dough over it like an envelope. Seal the edges completely.
Roll the dough gently into a rectangle, then fold into thirds (a “single fold”). Chill for 20–30 minutes. Repeat the rolling and folding process two more times, resting between folds. This creates dozens of alternating layers of dough and butter — the hallmark of a proper laminated pastry.
4. Rolling and Shaping
Once the dough has completed its folds and is thoroughly chilled, roll it to about 2–3 mm thickness. Cut into long triangles. Starting at the base, roll each triangle toward the tip to form the crescent shape. Tuck the tip underneath to prevent unrolling. Place croissants on lined trays with space between each one.
5. Proofing
Cover lightly with plastic wrap and allow to proof in a warm, humid environment until doubled in size. Properly proofed croissants will look puffy and jiggle slightly when you shake the tray. Avoid overheating — too warm and the butter will melt, destroying the layers.
6. Baking
Preheat the oven to 190°C (375°F). Brush each croissant gently with egg wash for a glossy finish. Bake for about 20–25 minutes until puffed and deep golden brown.
Remove from the oven and cool on a wire rack for at least 10 minutes before serving.
7. Serving and Storage
Serve warm for the best flavor and texture. The buttery aroma and crisp crust are at their peak when fresh.
Store cooled croissants in an airtight container for up to 3 days, refrigerate up to 5 days, or freeze for up to a month. Reheat frozen croissants directly in the oven at 160°C (320°F) for 8–10 minutes.
Tips for Perfect Croissants
- Keep everything cold during the process — dough, butter, and workspace.
- Use butter with at least 82% fat for pliability and rich flavor.
- Chill the dough between folds to maintain layer integrity.
- Handle dough gently; too much pressure during rolling can crush layers.
- Measure ingredients by weight, not volume, for precision.
- Avoid over-proofing or proofing in hot conditions.
- Don’t rush — give each stage enough rest time for gluten relaxation and butter firming.
Common Mistakes and How to Fix Them
Butter leaks during baking
→ Butter was too soft or melted during proofing. Keep temperature lower and rest dough in the fridge if needed.
Dense, bread-like texture
→ Usually from under-proofing or insufficient lamination. Let croissants proof until visibly airy.
Layers disappear
→ Rolling too aggressively or folding when butter is too warm can cause smearing. Keep everything cool.
Croissants deflate after baking
→ Over-proofed or under-baked. Bake until deep golden with crisp edges.
Exterior too dark before fully baked inside
→ Oven too hot or thick egg wash. Reduce heat slightly and apply a thin, even coat.
Workflow Options
Two-Day Method
Day 1: Make dough and butter block. Chill overnight.
Day 2: Laminate, shape, proof, and bake.
Three-Day Method
Day 1: Make dough and rest overnight.
Day 2: Perform folds and lamination; chill overnight.
Day 3: Shape, proof, and bake for maximum flavor and texture.
One-Day Version
A quicker method where all steps are done within one day. It yields slightly fewer layers and less honeycomb texture but is still delicious.
Variations
- Pain au Chocolat: Roll rectangles instead of triangles and enclose chocolate batons.
- Almond Croissants: Fill baked croissants with almond cream, top with almonds, and rebake.
- Savoury Croissants: Add cheese, ham, or herbs before shaping for a breakfast twist.
- Mini Croissants: Cut smaller triangles for bite-sized versions, perfect for parties.
Serving Suggestions
Serve croissants warm with butter, jam, or honey. They also pair beautifully with café au lait or espresso. Leftover croissants can be transformed into bread pudding, French toast, or croutons for sweet-savoury salads.
Final Thoughts
Making croissants at home is one of the most satisfying baking experiences. The process teaches patience, precision, and appreciation for French pastry craft. With careful attention to temperature, timing, and technique, you can master this buttery croissant recipe and impress everyone with your own homemade pastries.
Each batch you make improves your skill — soon you’ll achieve those perfect, flaky layers and tender interiors that define an authentic croissant.
So take your time, trust the process, and enjoy every step of your croissant-making journey.